How to Put the Password on PC Folders
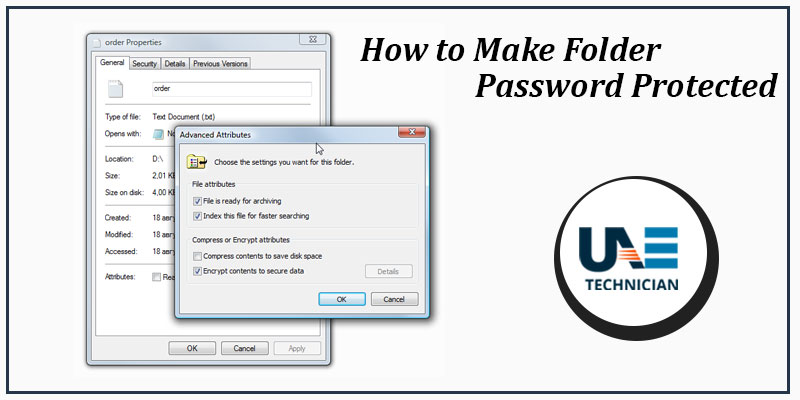
How to put the password on PC folders-You have started to store important data on your computer and you want to make sure you keep it away from prying eyes, without setting up complex blocks that can slow down your work. For this reason you are thinking of putting the password to the PC folders but, being impractical with computer science, you are afraid that your knowledge is not sufficient to achieve the goal you have set.
Well, I’m happy to tell you that you have nothing to fear because, with the advice that I will give you in this guide, you will be able to protect the folders of your computer even without advanced knowledge in technology, and you can do it on both Windows and macOS and Linux completely free. All you have to do is sit still, take some free time and read the following lines carefully: I guarantee that, without realizing it, you will learn to apply the right protection to your important data and keep eyes and hands indiscreet from your most important data.
Before entering the tutorial, however, I want to make an important recommendation: choose a secure password that can not be easily guessed by other people (for example, avoid using your date of birth or other so simple information), and pin it down in a safe place so as not to forget it: in most cases, losing your password means you can no longer access protected files, always keep it in mind!
Put the password on the PC folders on Windows
As for the Windows operating system , the solutions you can rely on to put the password to PC folders are multiple: the easiest solution is undoubtedly create a compressed archive protected with a dedicated program, to be accessed if necessary by typing the password choice. Other solutions, however, provide for the installation and configuration of tools that allow you to encrypt and protect files and folders.
Each of these methods has its pros and cons: for example, there are special programs that can “force” the passwords set to protect compressed archives, which is why there is a probability of recovery even in case of lost password. Programs to protect folders after encryption, however, are more difficult to bypass but require a slightly longer configuration. It’s up to you to choose the method that suits you!
7-Zip
7-Zip is a well-known program for creating compressed archives , which allows you to set a password to be typed when opening the files created with it. How to use? I’ll explain it to you right away. First, go to the 7-Zip website and press the Download link next to the word exe , depending on the version of your operating system ( 32 or 64 bit ), which you find in the table above. Next, start the downloaded file and press the Yes , Install and Close buttons to finish the setup.
Now, to protect a folder, right-click on it and select the entry 7-Zip> Add to Archive … from the menu that opens. The following window allows you to set the parameters for creating the archive: then choose from the Format menu of the archive the type of compression you want to apply ( 7z or zip , because the others will not allow you to protect it), type the password you want use to protect the archive in the boxes Enter password and Re- enter password (choose a secure, I explained how to do it in my dedicated tutorial ), select the entry AES-256from the Cryptographic method drop-down menu , finally put the check mark on Encrypt the file names and press the OK button .
Once the procedure is complete, double-click the archive you just created to open it, enter the password to extract it and verify that all the files are in place. At this point you just have to delete the original folder containing the unprotected files: holding down the Shift key , right-click on its icon, select Delete from the context menu and answer Yes to the warning that appears on the screen. It was not difficult at all, was it?
Veracrypt
Another very useful program to secure the PC folders is VeraCrypt : it is a software that, in a few clicks, allows you to create real “volumes” protected by a password, to be opened and modified exactly as if they were external disks or keys USB.
To download the program, connected to the dedicated Internet site , click on the Download button on the right and then on the entry VeraCrypt Setup xx.exewhich is next to the Windows icon . Now start the exe file you just downloaded and press the Yes button , check the I accept the license terms box and, to complete the installation process, click on the Next button twice in a row and then on Install, OK , Finish and No . At this point, start the program by calling it from the desktop or from the Start menu /Start Screen , click on the Settings> Language item , choose the Italian option and then click OK .
To start creating the protected “folder”, click on the Create a volume … button, check the Create an encrypted container file box , press the Next button and select the Volume CeraCrypt Standard entry . Click on the Select file …button and choose the folder in which to save the new volume, assign a name to the latter by typing it in the appropriate box and click on the Save and Nextbuttons .
In the next window, choose the encoding algorithms and “confusion” (you can safely leave the default options AES and SHA-12 , if you do not know what it is), presses the Next button , specifies the maximum size that your volume must have and select the unit of measure (KB, MB, GB or TB) through the appropriate boxes and click on Next .
Now it’s time to choose a secure password that you can easily remember: digit it in the Password and Confirm boxes (you can set the check mark in the Show Password box if you want to make sure that you type correctly) and click on the Next button .
Then you have to choose “how” your folder should behave with regard to saving files (so the file system to use for your volume): if you intend to save files larger than 4 GB (eg film or ISO images), check the box Yes , press the Next button and select NTFS from the File System drop-down menu in the next window, otherwise check the No box , click the Next button and choose the FAT item from the drop-down menu.
At this point, generate a strong coding key by moving the mouse randomly in the program window until the bar turns green , then click on the Format button and, as the procedure is completed, on the Yes , OK and Exit buttons .
Accessing the newly created volume is very simple: open VeraCrypt , select one of the drive letters from the appropriate section (eg G:) , click on the Select file … button and choose the protected volume created previously. Then press the Mount button , type the password in the appropriate field and click OK . If all went well, you can access your “protected folder” directly from the Computer or This PC sectionWindows: double-click on the drive letter chosen and manage the files inside exactly as if it were a USB stick or an external disk. This means that you can copy files, rename them, move them from one folder to another, and so on.
Once you have finished your work, to unmount the volume and block it, simply open the VeraCrypt main screen, select the chosen unit and press the Unmount button .
Put the password on the PC folders on macOS
Do you own a Mac and would you like to protect your folders with a password? Do not worry, it’s possible and even rather simple! Below I will explain how to install VeraCrypt also on the Apple operating system and, in the next section, how to use the Disk Utility to create encrypted volumes.
Veracrypt
As I have already mentioned, one of the solutions that you have available is VeraCrypt , the program seen above for Windows. Before proceeding with the actual installation, however, you must equip your operating system with the FUSE for macOS application : to proceed connected to its Internet site , presses the FUSE for macOS xxx icon on the right and wait for the program be downloaded to your computer.
Once the download is complete, open the file, double click on the Fuse for macOS icon , press the Continue button three times , then click on Accept , Continue and Install , type in your password, click on the Install Softwarebutton and then on the Ok buttons and Open Security & Privacy System Preferences . At this point, click on the Allow button that you find at the bottom, close the System Preferences window , press the Close button in the FUSE installation window and finally the Move button .
Now you can proceed with the installation of VeraCrypt: connected to the dedicated web page and click on the VeraCrypt_x.xx.dmg link , wait for the file to be downloaded to your computer, open it and double click on the VeraCrypt_installer.pkg icon . At this point, press the Continue button twice , then click Accept and Install , enter when asked for your password and presses again on the Install software , Close and Move buttons .
Recall finally veracrypt from the folder Applications on your Mac and use it exactly as I explained in the section dedicated to Windows, replacing the Finderto Computer / This PC and disk number to the drive letter . But I must warn you that, in this case, the program is available only in English.
Disk Utility
If you believe that the procedure with VeraCrypt is too long, do not intend to install third-party programs on your computer or chew English very well, know that you can get a very similar result using the Disk Utility already present in the operating system of your computer. What you need to do is create an encrypted volume (therefore password protected) and save all the files you want to protect.
To proceed, launch Disk Utility from the Applications> Utilities folder of your Mac or by calling it from the Launchpad’s Other folder , click on the Fileitem you find at the top left, then on the New Image> Empty Image … menu, then set the menus to show you below.
- Save with name and name – type the name you wish to assign to your volume.
- Located in – choose the location where you want to save the volume and its data.
- Size – set here the maximum size that your archive can reach, according to your needs.
- Format – select the Mac OS extended (journaled ) entry .
- Partitions – select Single Partition – Map of Apple Partitions .
- Image Format – select Disk Image Sparse Bundle .
- Encoding – select the 128-bit AES entry .
After selecting the encoding type, type in the password you want to protect your volume in the Password field and enter it again in the Verification field , then click on the Choose , Save and then Finish button .
After completing the procedure, go to the location where you saved your “protected folder”, open it by double clicking on it and type the password you have set in the box provided, then click on the OK button .
At this point the encrypted volume is opened in the Finder , you can manage it exactly as you would for an external disk or a USB stick: for example, with a simple Cut / Paste operation you can move the files inside, you can rename them, create new folders , move files from one folder to another and so on. When you’re done, remember to unmount the volume by clicking on next to the volume in the Finder sidebar , or by right clicking on the desktop icon and selecting Eject from the menu that opens. Simple, is not it?
Put the password on the PC folders on Linux
Do you use the Linux operating system ? Do not worry, putting the password in the PC folders is not difficult even in this case: just know the right tools! First of all, I want to tell you that you can use VeraCrypt to create encrypted volumes, in the same way as I explained to you in the Windows section. If you are looking for something more specific, I suggest you refer to the open source EncFs program , which allows you to create an encrypted volume in which to save all the files to be protected.
To install it on Ubuntu, open a Terminal by calling it from the GNOME Activityview or the Unity Dash , type in the sudo add-apt-repository ppa: gencfsm command followed by Enter , type the administrator password followed by Enter , then type the command sudo apt-get update && sudo apt-get install gnome-encfs-manager , hit Enter, then S and twice Enter , and finally close the terminal once the installation procedure. Do you have another distribution? No problem: you can find dedicated packages on this website .
After completing the installation procedure, restart the computer and recall the program from the application list of your operating system. Crushing and on the green button + from the header, type the password chosen in the fields Enter password : and Re-enter password : , then click on the Create and wait for the confirmation message. Note: you can customize the name of the encrypted volume or the edit point by checking the appropriate boxes and typing in the fields the desired parameters.
Now, to access the newly created volume, double-click on the icon on the desktop or in the left sidebar of File . You can use the encrypted volume exactly like an external disk or a USB stick: you can move the files to be protected inside with a simple Cut / Paste operation .
When you are finished, unmount the protected volume by clicking on ⏏ in its correspondence in the File sidebar, or right-click on the icon on the desktop and select the Eject from the menu that opens.
To mount your protected “folder” again, click on the icon in the folder with the key you find in the top panel of GNOME, select the name of the archive you want to mount and, when prompted, type in the password. Easier to do than to say!

