iMessage Not Working on Mac: Here is an Easy Fix for You
iMessage is a messaging platform from Apple for sending messages instantly from iOS devices. Not only messages, but it can also send contacts, pictures, videos, and locations across various iOS devices like Mac, iPad, or iPhone. iOS 5 and later and OS X Mountain Lion are known to support iMessage. Thus, the problem arises when iMessage fails to work on your device.
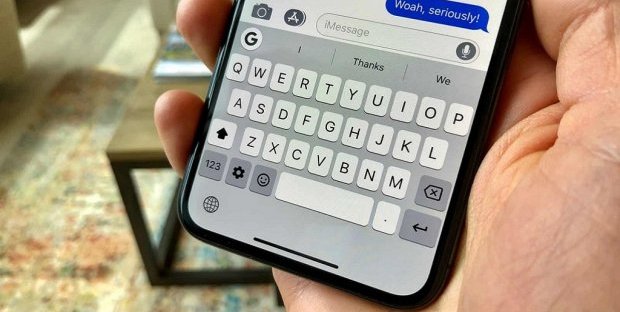
When you send messages from your iPhone, some are displayed in blue and remainings in green.
The blue messages indicate the use of iMessage service on your phone. So, if you turn off iMessage, then all messages will be displayed in green color. But, what happens when all messages appear green even when you haven’t turned off iMessage. It assumes that something is wrong with this messaging service.
You can’t fix the problem unless you figure out what’s going wrong with your iMessage. Thus, you need to follow this blog for a proper answer. Here, we have discussed how to fix iMessage on Mac, iPhone, and iPad.
Fix iMessage on Mac, iPhone, or iPad:
Start with the first method and move to the rest unless you can resolve the problem successfully.
Method 1: Check the System Status Page
In most cases, iMessages fail to work when the server remains down. Thus, in the first place, you need to check if iMessage is down or not. In this case, iMessage won’t work for anyone. To check the condition of the server, visit the System Status Page to know which of the Apple services are facing outages.
If you find that the iMessage server is down, then communicate with your friends via normal texts. If iMessage fails to work, then your message will be displayed in green bubble texts. Then, you will get an option ‘Send as text’ to continue.
Method 2: Check the WiFi Connection or Mobile Data
Hopefully, you know that iMessage needs a network connection to work. Now, if you are using a wireless connection, then check the signal strength first. The signal might be too poor to send your iMessage texts. In that case, you have to shift to another network.
Whereas, if you are using cellular data, then check how much data is available. If there isn’t sufficient data, then you need to buy a data pack for using iMessage.
If none of the aforesaid tips work, then reset your network settings. So, launch the Settings app and tap the General’ tab. Click ‘Reset’ and choose the ‘Reset Network Settings’ option. Now open iMessage and send a message to check whether it reaches the recipient or not.
Method 3: Check iMessage Configuration
Go to Settings and tap ‘Messages.’ Locate iMessage and check whether it is enabled or not. If you receive a message that ‘Waiting for activation’ or ‘Activation Unsuccessful’, then go back to the Settings app. Now, select ‘Messages’ and navigate to the ‘Send and Receive’ section. Then check the mobile number and address you have entered.
If it’s not an activation issue, then repeat the following steps:
- Turn off your mobile number and email address registered with your iMessage app.
- Scroll down the ‘Start new conversations from’ section and select your mobile number if it has not been selected yet.
If iMessage is unresponsive on multiple devices, then repeat the above process for them as well.
Method 4: Turn off and Restart iMessage
This message is proved to be useful for several Mac users. Then, why not give it a try once.
- To restart iMessage, go to Settings and navigate to Messages.
- Scroll down the window and click the ‘Send and Receive’ button.
- Choose your Apple ID and tap the ‘Sign Out’ button.
- After signing out from iMessage, select the option ‘Use your Apple ID for iMessage.’
- A dialog box will appear, display your Apple ID, and ask you to log in.
- Tap the ‘Sign In’ button to log in with the displayed ID.
- Then, open the Message app and choose ‘Preferences’ from the upper left portion of the window.
- Navigate to the iMessage tab and click the ‘Sign Out’ button.
- You will see a login screen with your existing Apple ID email address.
- So, enter the correct password and tap the ‘Next’ button to log in.
- Send a message to an iMessage contact and verify whether it works fine or not.
Method 5: Reboot Your Mac
- Go to Settings and tap Messages.
- Swipe the toggle for iMessage located at the top of the screen in order to disable it.
- Reboot your Mac and turn on the toggle for iMessage.
- Then, launch the Messages app and choose ‘Preferences’ from the app menu.
- Move to the ‘Messages’ tab and uncheck the option ‘Enable this account’ under your Apple ID.
- Reboot your Mac and turn on iMessage to see whether it works correctly or not.
Method 6: Reset Network Settings
It works as an effective solution or most iOS users including Mac. Therefore, launch the Settings app and tap on the ‘General’ tab. Scroll down to the bottom of the screen and tap the ‘Reset’ button. Click ‘Reset Network Settings’ and wait for the process to complete.
Note: This method won’t erase any files or apps from your Mac. However, it will forget the saved WiFi networks. Thus, you have to enter the passwords of the respective networks again.
Method 7: Check Time Zone Settings
According to some users, iMessage problem occurs when the time zone settings aren’t set to update automatically. To rule out this probability, open the Settings app and tap on the ‘General’ tab. Choose ‘Date and Time’ and set the time zone to automatic. Then, return to the ‘General’ tab and choose the ‘Reset’ option from the submenu.
Method 8: Delete Some Messages
Your Messages app might slow down a bit if there are too many messages in your inbox. Thus, delete some messages especially the ones with lots of photos to fix iMessage on the iPhone.
- To reduce the size of your Message library, select required messages in the Messages list and tap the ‘Delete’ button.
- Alternatively, you can go to Settings and select ‘Messages.’
- Choose the ‘Keep Messages’ option for your Message History.
- Select a time period for example 30 days, 1 year, or Forever to delete unwanted messages.
- Now, send a message to ensure the working condition of iMessage.
Note: Messages sent via iMessage won’t be available in the Photos app.
Frequently Asked Questions:
1. How to Update iOS for iMessage?
The software update is essential to work smoothly with your iMessage service. Thus, go to Settings, tap the ‘General’ tab and select ‘Software Update.’ Wait until the software is updated to the latest version. Then, log in to your iMessage account and send the pending messages.
2. Why Aren’t My Friends Receiving iMessages?
Though your friends have an iOS device, iMessage might have been disabled. As a result, they fail to receive your message. Moreover, they need to activate iMessage if they have recently changed networks. The same problem will appear if your friends have switched from iOS to Android or Windows.
3. How to Recover Accidentally Deleted iMessages?
If you have lost messages after updating the iOS, then apply any of the following solutions:
- Retrieve messages from your iCloud or iTunes backup.
- If a backup is missing, then contact your phone provider.
- You can visit the iCloud website and retrieve your messages.
- Finally, take the help of a third-party app.
4. Why Can’t I Send a Group iMessage?
You can’t send a group iMessage if one of your contacts stop using his iPhone. In that case, you must start a new group message with the same participants.
- 1165
Related Articles
Categories
- AC Repair
- Antivirus Support
- Apple
- Apps
- brother printer
- Brother Printer Repair Service in Dubai
- Browser Support
- Canon Printer Issues
- CCTV Solutions
- cloud services
- Data Recovery
- Data Recovery Service
- Disk Diagnostic
- Dryer
- Email Support
- Epson Printer Repair
- Featured
- Home Appliance
- Home Cleaning
- How To Choose
- How to Fix
- HP Printer Repair
- HP Printer Support
- iPhone
- IT Support
- Keywboard Solutions
- Kyocera printer issues
- Laptop Adapter Repair
- Laptop Battery Replacement
- Laptop Camera Repair
- Laptop Issue
- Laptop Overheat Repair
- Laptop Screen Replacement
- Memory Diagnostic
- Microsoft Excel
- Microsoft Office
- Microsoft operating system
- Microsoft Outlook
- Microsoft Windows 10 operating system
- Microsoft Windows 7 operating system
- Mobile Issues
- Network Solutions
- OS Support
- Phone Repair
- Printer Repair
- Replace Laptop Hard Disk
- Replace Laptop Motherboard
- Router
- Samsung Printer Issue
- Scanner Repair Process
- Screen Repair Technique
- Setup Diagnostic
- Smartphone
- Software's Solutions
- Technology News
- TV Repair
- TV Reppair
- Uncategorized
- Virus Removal Service
- Washing machine
- Windows 10
- Xbox
Recent Posts
- Is Antimalware Service Executable a Virus? Is it Safe? How to Solve the Issue?
- How to Remove Microsoft Account from Windows 10? Follow 4 Quick Steps
- ‘System Thread Exception Not Handled’ Error Resolve with 6 Quick Methods
- 6 Quick Fixes to Resolve the Error — ‘This Copy of Windows is not Genuine’
- ‘Sorry we couldn’t connect to Skype’ — Here’s How You can Resolve the Glitch
