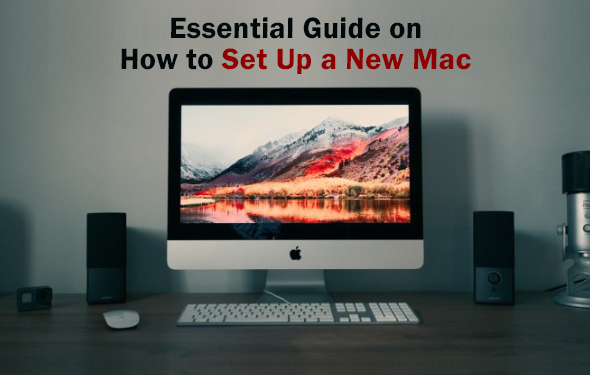
A Comprehensive Manual on how to Set Up a New Mac in Dubai UAE

Have you just purchased a brand new Mac? Whether you are reinstalling from scratch or setting up a brand new one, you need to think a lot before setting up your Mac and make it ready to use. If you are new to Mac, you definitely need a little preparation before starting up. Though the procedure of setting up Mac is simple and easy as you just need to follow the on-screen prompts, yet you might be afraid of doing anything wrong. But don’t worry, in this blog, we will explain how to set up a new Mac and get started with it. You just need to go through the steps provided below. You need to run through the setup process mentioned over here, enter your account details and then transfer your data from an old PC to your brand new Mac. After that, your new Mac product is ready to use.
Essential Guide on how to Set Up a New Mac
In this handy guide, we will provide you with every piece of information to set up your new Mac in the right way. From initial setup to some awesome tweaks, you will get an overall guide on setting up your new Mac in the right way. Just go through the steps analyzed in details below:
Step 1. Power on your new Mac

At first, unbox your Mac and switch it on by plugging in the power supply. Though MacBooks tend to carry some charge, it’s better to plug in your Mac before use in order to avoid running out of battery. After that, you need to attach your brand-new Mac Pro or Mac Mini with a keyboard and a mouse. Then, you just need to press the Power button for switching on your Mac.
Step 2. Run Setup Assistant
This is quite an easy process as here, the setup wizard will take you through each step. After completing these steps, you can easily set up your Mac. Even you will have the option to skip some of the steps and you can choose to perform it later, such as Touch ID, Hey Siri, etc.
For the first time when Apple Mac runs, it launches a program called Setup Assistant. This program will help you in guiding through the account creation process and will also help in setting up your Mac. Moreover, it also allows you to decide on your privacy settings, being run through the legal documents. During the setup procedure, every screen will offer some sort of selections and a Continue or Next button. Like, the first screen displays a Map, where you need to select a country and press Continue. This step will ensure the correct reading of the clock inside your Mac.
Below, we have discussed the further steps to Set Up a New Mac

- Select the type of keyboard. You need to check that the keyboard is set to the British (not the US). Even you are required to hit the “Show All” button to reveal the layout of the British keyboard.
- After that, you need to connect your PC to a Wi-Fi network. You can do it by choosing your network’s SSID (name) and by entering the password. If you fail to find your Wi-Fi password, then you can have a look at the side of your router, where it might be written.
- If you are trying to upgrade your old Mac device, then you can use the Time Machine backup for transferring the information to your new Mac. There is a program called Migration Assistant, which it uses. You can run this program at any time. If you don’t prefer to do it now, you can easily opt for this step later on. For that, you just need to click on the Not Now option and then select Continue.
- Next, you need to set up your Location Services. By doing this, the apps will be able to locate your position. There are some Apple apps like Find My Friends and Maps which make the best use of these location services. But then, you have to provide permission to each individual app for doing this. Thus, it’s undoubtedly a good idea to tick on this option ” Enable Location Services on my Mac.” After that, click on the Continue option.
- Next, to that, you will get to see a Data & Privacy pop-up window. This window option is new in the High Sierra. It will warn you by getting you notified whenever any personal information regarding you is requested. Then, click on Continue.
- After this step, you are required to sign in with your Apple ID and Password. This Apple ID should be the same which you use for making purchases from the App Store. If you want to get an Apple ID, you need to provide a credit card and a good password lock. This Apple ID usually ends in “icloud.com” which helps you in downloading free apps from the Mac App Store. But you can opt this option for signing up later by clicking on the Skip option, in case you don’t fancy getting an Apple ID.
- If it possesses a two-factor authentication set up, then you will receive an alert when anyone else tries to login with your ID in another device. Even you will be sent codes on the other device to enter your Mac if you are elsewhere in the country.
- Then, you will get to see another window which will come with an option to Enable Siri. By enabling this option, you will be able to use the voice-activated assistant for doing various tasks on your Mac device.
- The next step involves the setting up of iCloud account which will automatically sync your contacts, calendars, Mail accounts, web browser information, reminders, and notes. Here, you will also have the option to store files in the iCloud drive from Documents and Desktops. It provides you with 5GB of storage space to store documents in the new iCloud Drive.
If you are using macOS Mojave, then there you will get an additional option to choose whether your interface is Dark or Light. Even by going to the Settings, you can change your selection later on. You might also see some additional windows, depending upon the version of macOS, which is being installed on the Mac. When you will get the final screen in your Mac, it will simply say ‘Thank you.’ Then, you just need to click on the Continue option and your Mac is ready to use.
Step 3. Visit the App Store

Before going further, all you need to do is click on the App Store. From there, select the Updates option and then, click on Update All. Updating the software before going further undoubtedly is a good idea.
By performing all these steps, hopefully, your Mac will finalize all the settings and the iCloud syncing. This might take a while, but it’s normal so no need to worry. After setting up the Mac has finished, you will receive a pop-up notification for signing into various social networking accounts and mail accounts. You need to turn on notifications for sign in. But if you feel that anything has been overlooked, you can feel free to contact our experts at UAE Technician. They will help you with the most appropriate and best solutions available.
Frequently Asked Questions:
- How to set up your new MacBook?
If you want to set up your MacBook, then it’s important that you must follow the basic steps described below:
- If your Mac starts up to the setup assistant, you need to restore it from a backup
- Then, check for an internet connection and plugin only the essential devices
- After that, turn on your Mac device and use the setup assistant
- Finally, check for software updates if any.
- How to set up an old MacBook Pro?
- First of all, go to the utility folder of your Applications and open Migration Assistant from there
- Then, click on the Continue option and it will ask for options through which you want to transfer your information.
- After that, click on the Continue option again.
- How to log in and access iCloud sync settings on your Mac?
For that, you need to perform these steps:
- At first, go to the Apple menu and launch System Preferences from there on your Mac
- Then, click on the iCloud option
- After that, you need to checkmark the iCloud services which you want to enable on your Mac
- How do I create an Apple ID on my Mac?
You can easily use iTunes on your Mac to create an Apple ID:
- At first, open iTunes and go to the menu bar at the top of the computer screen or at the top of the iTunes window
- From there, choose the Account option and then try to sign in
- Then, you should read and agree to the Apple Privacy Policy and Terms and Conditions.
- After that, complete the form for creating a new Apple ID.
Related Articles